How to connect a tank level sensor in YakProject
A level sensor on a fuel or chemical tank keeps its figure current without anyone dipping it. Connecting it means telling YakProject where readings come from, the tank's shape, and which container the sensor sits on.
Before you start
- A member who can manage inventory on the job
- A LoRaWAN level sensor on ChirpStack or The Things Stack, or another sender that can post HTTP
Preview voice Narrated with a local preview voice; the final recording replaces it.
Transcript
Connect a level sensor, so a tank's figure stays current on its own.
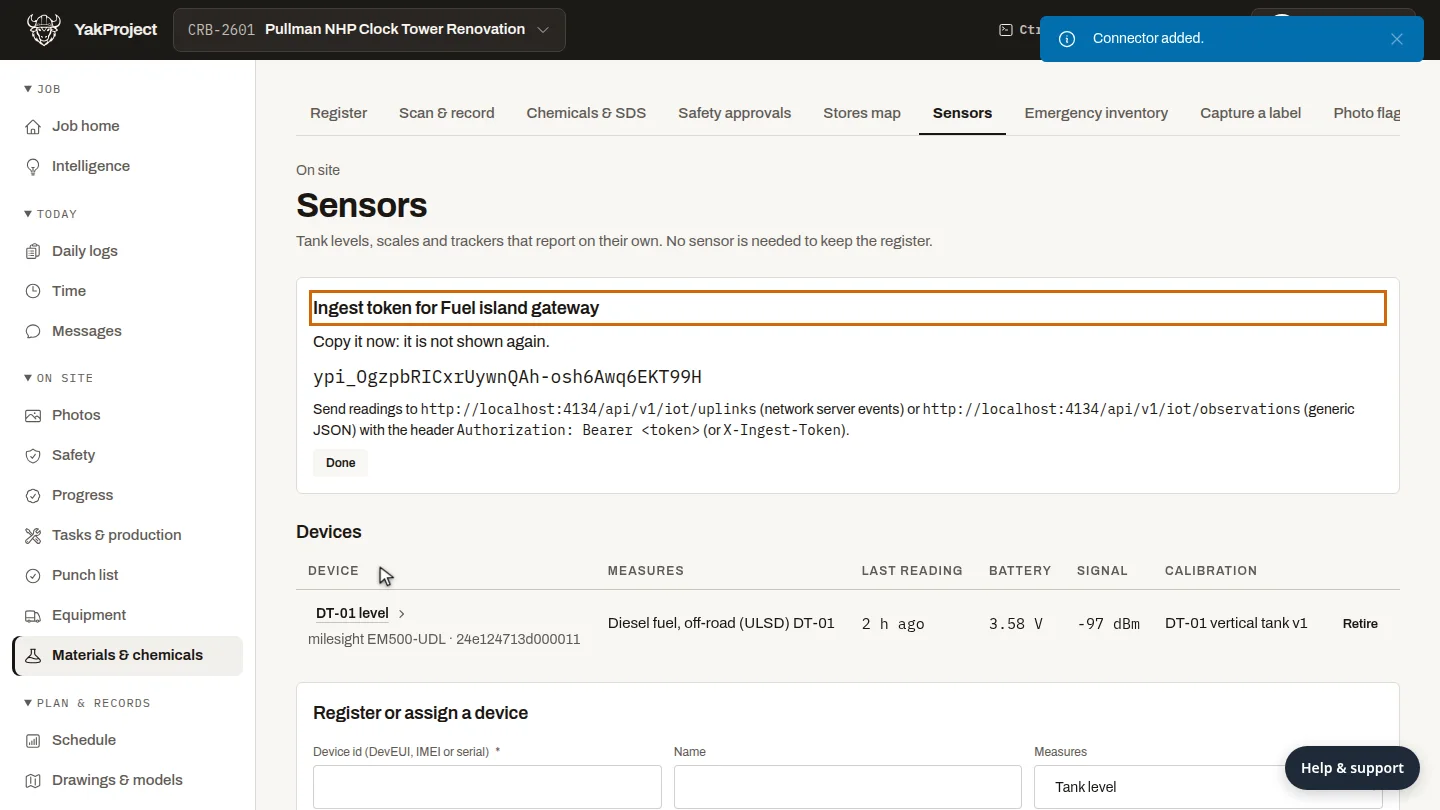
Start with a connector for where readings come from: name it, choose ChirpStack, and add it. Copy the token it shows once into the network server.
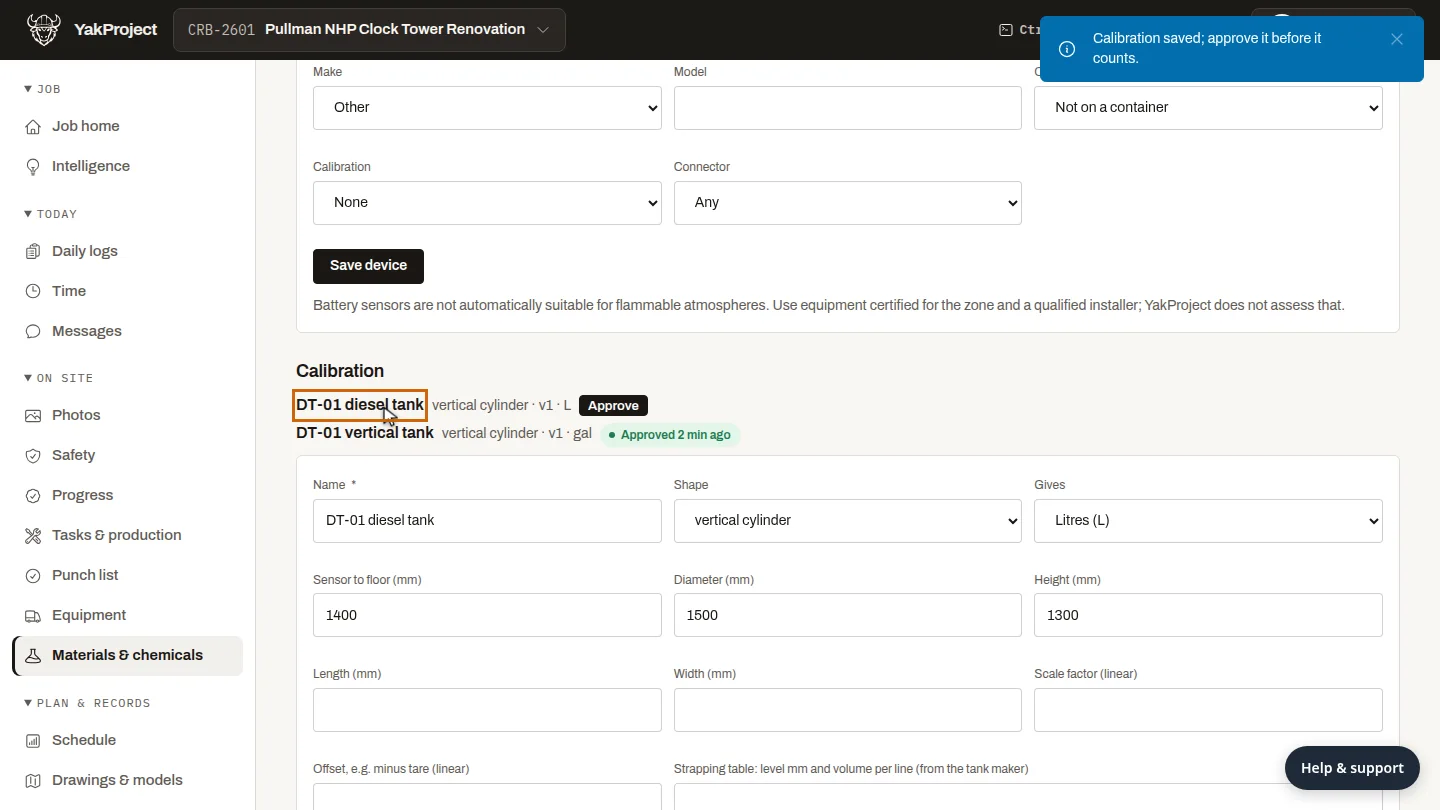
Under Calibration, describe the tank: its shape, diameter, height, and the distance from the sensor down to the floor. Select Save calibration.
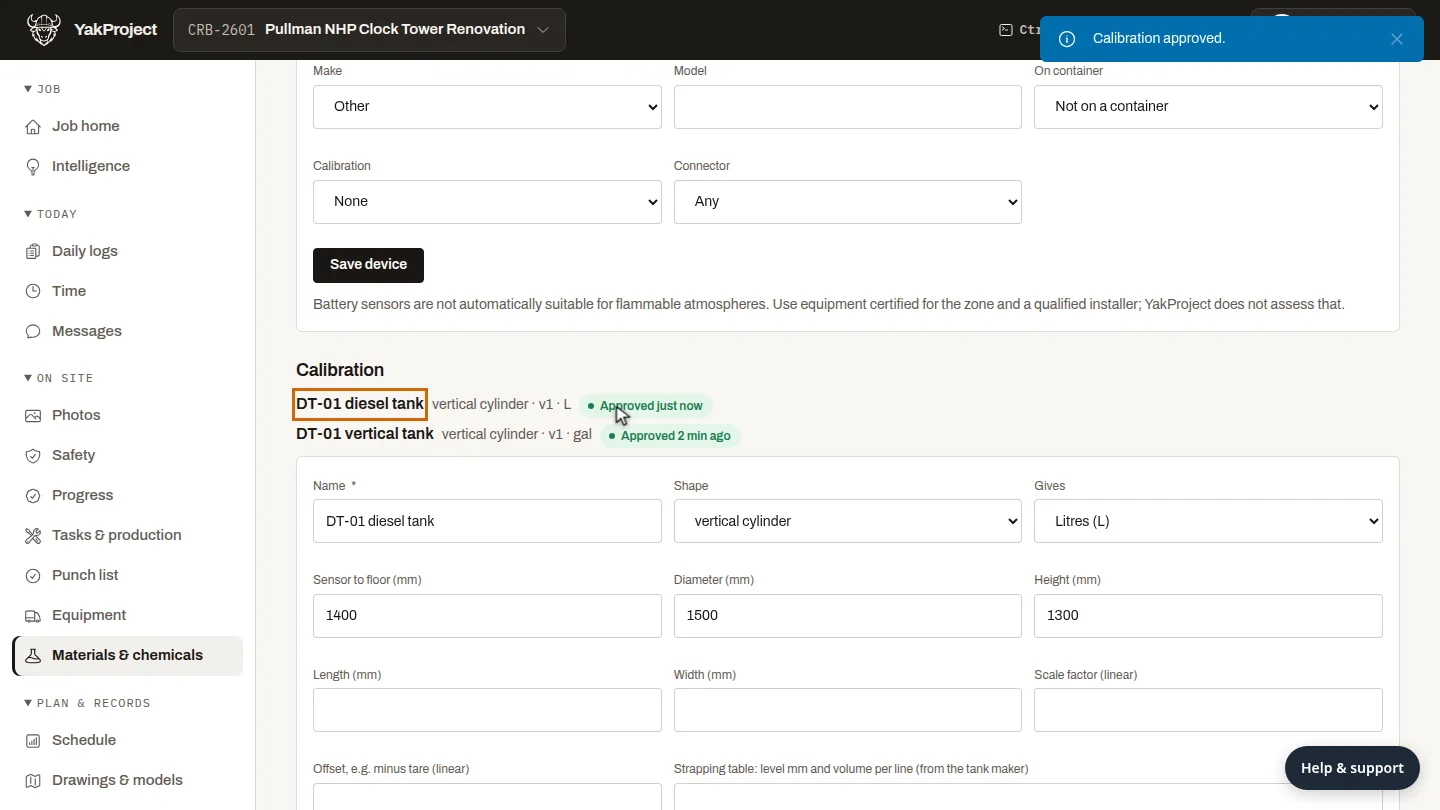
The new calibration waits for approval. Select Approve, so the figures it gives count as calibrated.
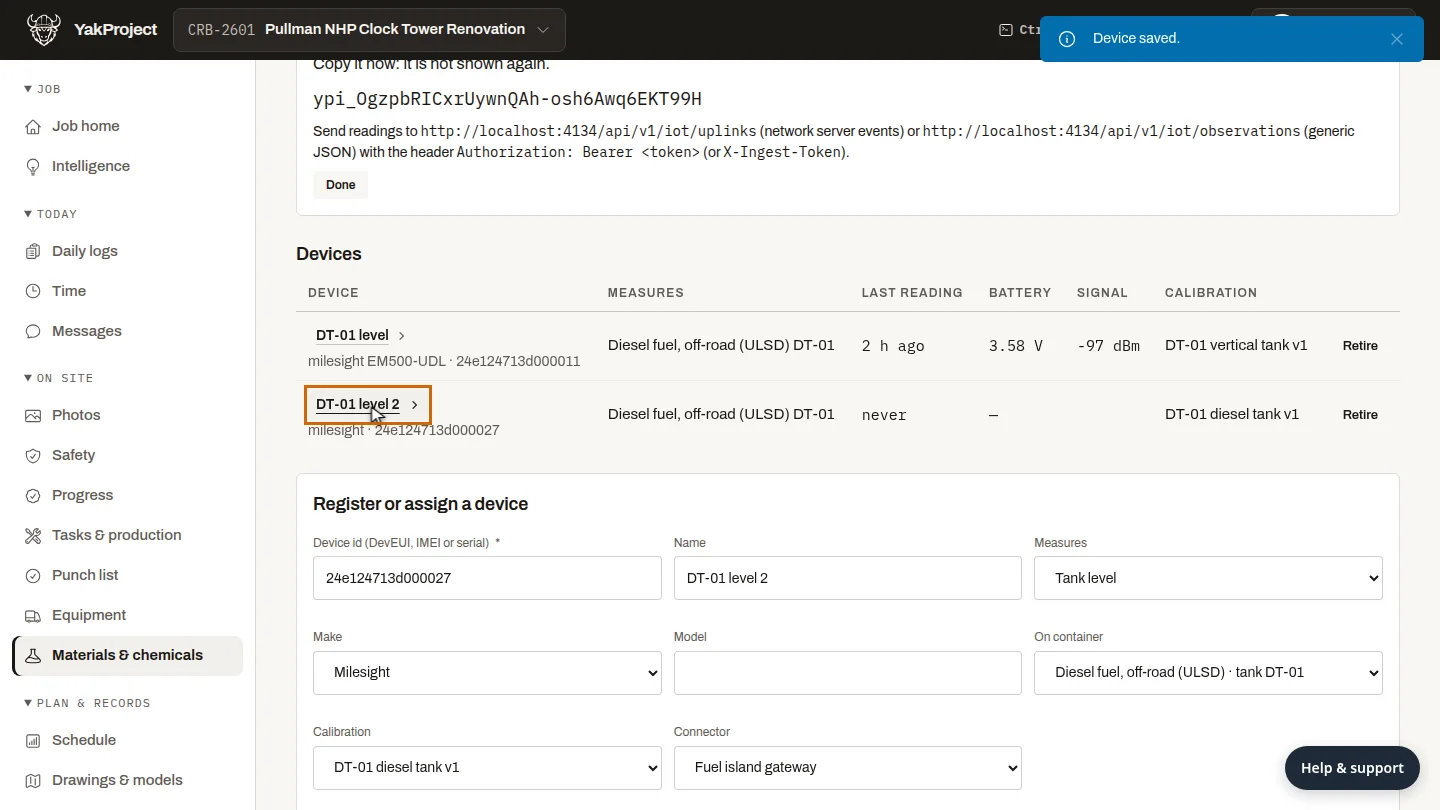
Register the sensor by its device id, put it on the tank, and pick the calibration and connector. Save it, and the sensor joins the device list.
Steps
Add a connector ▶ 0:06
On Sensors, under Connectors, enter a Name, choose Sends from, and select Add connector. Copy the ingest token into your network server's HTTP integration: it is not shown again.
Describe the tank ▶ 0:16
Under Calibration, enter a Name, choose the Shape, enter Sensor to floor (mm), Diameter (mm) and Height (mm), then select Save calibration. The calibration is listed, waiting for approval.
Approve the calibration ▶ 0:27
Beside the new calibration, select Approve. Until then its figures don't count as calibrated.
Register the sensor ▶ 0:35
Under Register or assign a device, enter the Device id (DevEUI, IMEI or serial) and a Name, choose the Make, On container, Calibration and Connector, then select Save device. The sensor appears under Devices.
Next steps
Updated 2026-11-04
IoT LoRaWAN ChirpStack The Things Stack ultrasonic tank level MQTT